How to Properly Connect Kitchen Countertops and Backsplashes
GF Leads, 27 August, 2025
Until recently, the joint between backsplashes and countertops was typically covered with flexible plastic molding from hardware stores. In modern designs, this approach is mostly found in budget-friendly projects. Together with GFLeads experts, we explain how to properly execute this important connection and the advantages of each solution.
GFLeads specializes in connecting professional craftsmen with clients across the United States. We help kitchen installation specialists find projects and grow their businesses.
1. Slim Molding from Countertop Manufacturer
The simplest solution is to order matching artificial or natural stone molding when fabricating your countertop.
Key points: Traditional flexible molding was used to hide installation gaps. Countertops were never installed flush against backsplashes. Triangular plastic molding (sides measuring approximately 1 inch) effectively concealed gaps between walls and cabinetry. Modern rectangular molding (approximately 0.4 inches thick) can only cover perfectly executed installation seams.
Thus, stone molding requires perfectly aligned walls and cabinetry mounted flush against them.
2. Medium-Height Molding as Backsplash
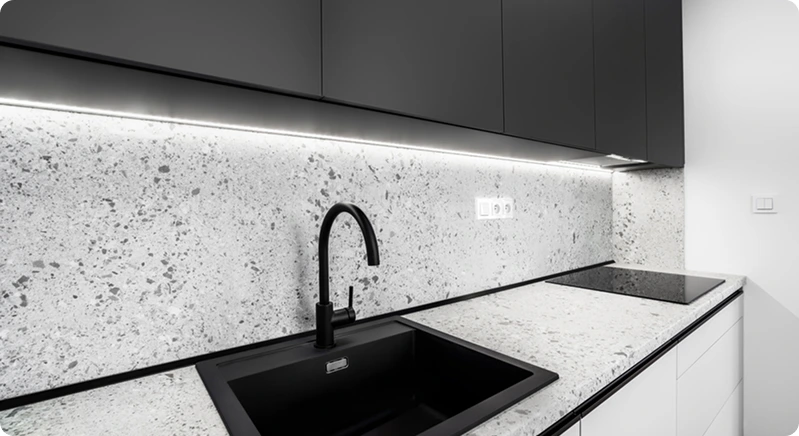
Perfect for those embracing the European trend of "backsplash-free backsplashes." The lower portion, most vulnerable to stains, is protected by durable material. The remaining wall surface receives stain- and moisture-resistant finish.
Important note: Countertops transitioning into backsplashes must use monochromatic color schemes. Multicolor designs may appear overly flashy and tasteless.
3. Backsplash as Side Splash
An evolution of the previous concept - countertops without any molding. The backsplash role is fulfilled by material matching the main countertop (artificial or natural stone). This approach ensures complete seam elimination, removing need for additional sealing and moisture protection.
4. Epoxy Grout
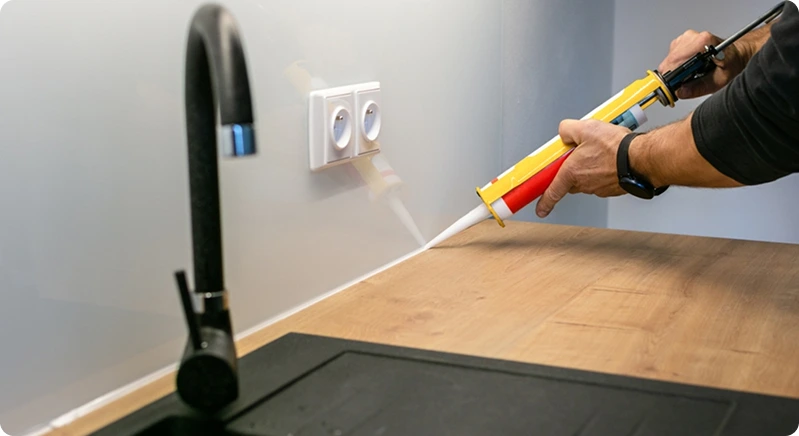
Recommended for cabinetry with substantial countertops and tiled surfaces. Use sealant for joints between ceramic backsplashes and countertops of different materials.
Critical point: Use epoxy grout instead of traditional cement grout. While significantly more expensive and requiring specialized installation skills, epoxy grout provides absolute moisture resistance. This prevents mold formation, darkening or greening of seams, and uneven discoloration from constant water exposure.
5. Countertop Sealant

Used when combining different materials - porcelain/stone/tile backsplashes with laminated MDF or solid wood countertops.
Crucial consideration: The installation sequence changes! First install kitchen cabinetry with countertops. Only then install backsplash tile. Minimal installation gap remains, with existing spaces treated with transparent sealant. Silicone sealant is acceptable; some recommend automotive glass sealant.
This approach might seem unconventional - not everyone will perform "dirty work" after kitchen installation. However, this is how designers achieve perfect backsplash-countertop joints.
Important fact: Textured backsplash tiles must be installed this way, resting on pre-installed countertops. Silicone connection remains the only viable option here.
6. Metal Trim
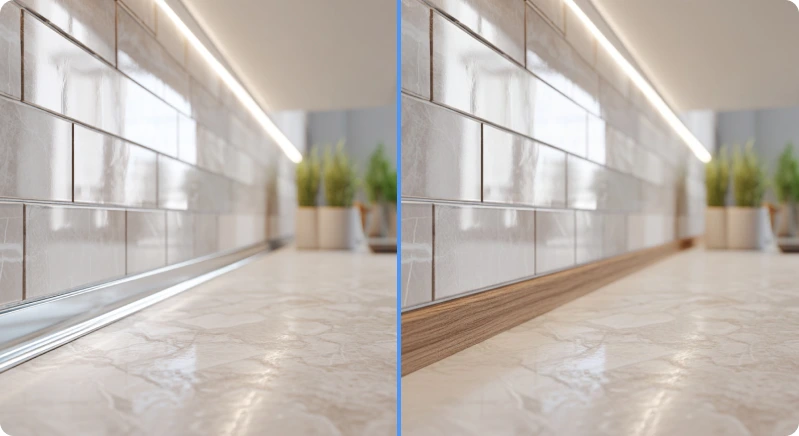
Refers to so-called tile transition strips. Available in plastic (appears cheap) or metal. Allows covering gaps between backsplashes and countertops without sealant.
Key point: Installation sequence matches the sealant method - first complete kitchen installation, then install first backsplash tile row using metal transition strip. Color matching should coordinate with fixtures (faucets, rails) or sinks - chrome and brass options are readily available.
Plastic Molding Alternatives

Metal Border Between Countertop and Backsplash
With perfectly flush countertop-wall alignment (perfectly even surfaces and tightly fitted cabinetry), simply cover the joint with metal stripping. This essentially replicates option 1 (artificial stone) and serves as an alternative for those disliking thin tile profiles. Match metal color to faucets or sinks.
Wooden Corner for Kitchen Backsplash
Sometimes used by designers. The challenge lies in matching molding to substantial countertops. Pre-matched sets represent ideal solutions. Avoid combining wood tones yourself by purchasing molding and countertops separately - high error probability. Better to use sealant or install tile through metal transition strips.
Installation technology resembles traditional wooden floor molding: apply adhesive to both ends, press corner against wall and countertop.
Not Recommended Solutions
Avoid various plastic moldings with triangular cross-sections. They create at least two joints instead of one in wall-adjacent areas, plus create cavities behind plastic strips. Mold actively develops on these surfaces within literally two years - expect regular molding replacement.
Conclusions

1. Both fashionable and outdated methods exist for countertop-backsplash joints
2. Triangular moldings are being replaced by rectangular versions. Plastic is making way for artificial/natural stone and metal
3. Many designers completely omit molding. Perfect alignment requires flawless horizontal lines and correct cabinetry installation sequence
4. Countertop-to-backsplash alignment must be perfect since rigid edges (unlike plastic) cannot compensate for initial imperfections
5. Only one method achieves perfect alignment: first assemble kitchen, install countertops, then install backsplash
6. Without gaps between backsplash and cabinetry, molding might be unnecessary. In such cases, fill joints with sealant or epoxy grout. Alternatively, install tile through metal transition strips
7. Owners of artificial/natural stone countertops should order matching height rims from same material. Nearly seamless installation ensures high hygiene
8. Most practical to purchase wooden countertop molding when ordering surfaces. Prefer bar-shaped molding over triangular options
GFLeads helps kitchen installers find customers across the United States. Our partner program offers favorable terms and guaranteed steady order flow. Join us!
Table of content
- 1. Slim Molding from Countertop Manufacturer
- 2. Medium-Height Molding as Backsplash
- 3. Backsplash as Side Splash
- 4. Epoxy Grout
- 5. Countertop Sealant
- 6. Metal Trim
- Conclusions


